

How To Remove A Background Color From An Image
-
Select the pic that you want to remove the groundwork from.
-
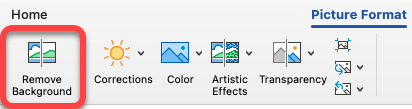
On the toolbar, select Moving-picture show Format > Remove Groundwork, or Format > Remove Background.
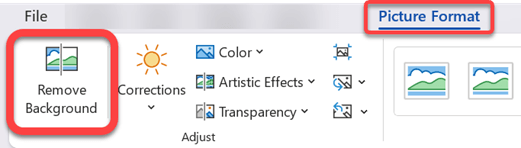
If you lot don't see Remove Background, make certain you have selected a picture. You might have to double-click the moving picture to select it and open the Flick Format tab.
-
The default background area volition exist colored magenta to marker it for removal, while the foreground volition retain its natural coloring.
-
If the default area isn't right, go to Groundwork Removal > Moving-picture show Tools and do one or both of the post-obit:
-
If parts of the picture that y'all desire to go along are magenta (marked for removal), select Mark Areas to Keep and use the gratuitous-class drawing pencil
 to marking the areas on the picture that you want to continue.
 -
To remove more than parts of the pic, select Mark Areas to Remove and utilize the drawing pencil
to mark those areas.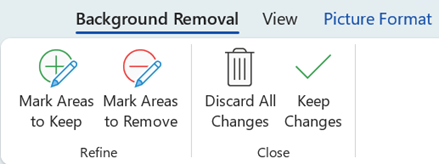
-
-
When you lot're washed, select Continue Changes or Discard All Changes.
To save the image in a split up file for after utilise, right-click the image and select Save equally Flick.
You can apply an artistic effect or add together picture furnishings to the picture remaining after you've removed the background.
Another pick for removing the groundwork
If your prototype isn't stored in an Office file, you can utilize a similar process with Windows Paint 3D. For details, run into Remove the background of a photograph with Paint 3D.
-
Select the picture that you lot want to remove the background from.
-
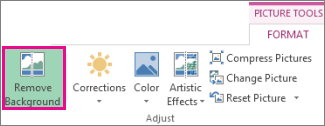
Under Motion-picture show Tools, on the Format tab, in the Accommodate group, select Remove Groundwork.
-
Click one of the handles on the marquee lines and and then drag the line and then that it contains the portion of the picture show that you wish to keep, and excludes most of the areas you wish to remove.

You can sometimes become the result you desire without any additional work by experimenting with the position and size of the marquee lines.
Tip:To undo marked areas, select Delete Mark and so select the line.
-
If the default surface area isn't right, become to Background Removal > Motion picture Tools and do 1 or both of the following:
-
Select Mark Areas to Go on and use the drawing pencil
to marking the areas on the picture that you want to proceed. -
Select Mark Areas to Remove and use the drawing pencil
to marker those areas to remove.
-
-
When yous're done, select Keep Changes or Discard All Changes.
To save the image in a separate file for afterwards use, right-click the image and select Salve as Picture.
You can use an artistic effect or add together picture furnishings to the picture remaining later on yous've removed the background.
-
Select the picture.
-
On the Moving picture Format tab of the ribbon, select Remove Groundwork.
If you don't run into Remove Background or the Motion-picture show Format tab, make sure that y'all've selected a flick. You might have to double-click the picture to select information technology and open the Motion-picture show Format tab.
-
The default background expanse is colored magenta to marking information technology for removal, while the foreground retains its natural coloring.
-
If the default area isn't right, under Picture Tools, on the Background Removal tab, exercise i or both of the following:
-
Select Mark Areas to Continue and employ the free-course cartoon pencil
to mark the areas on the picture that you want to go on. -
Select Marking Areas to Remove and utilize the drawing pencil
to marker those areas to remove.
-
-
When you're done, select Keep Changes or Discard All Changes.
To save the image in a divide file for later employ, right-click the image and select Save every bit Picture.

How To Remove A Background Color From An Image,
Source: https://support.microsoft.com/en-us/office/remove-the-background-of-a-picture-in-office-c0819a62-6844-4190-8d67-6fb1713a12bf
Posted by: rosenbergequed1960.blogspot.com
0 Response to "How To Remove A Background Color From An Image"
Post a Comment